Below is a guide on what you should have received with your Modem and how to set it up.
Box Contents
- DM111P ADSL2+ Ethernet Modem
- AC power adapter (varies by region)
- Category 5 (Cat 5) Ethernet cable
- Telephone cable with RJ-11 connector (A-tick certified)
- Microfilter in some countries (type varies by region)
- Resource CD, including this guide
- Warranty and Support Information Cards
(You should not need to use the CD / Setup Guide as this will have been done for you)
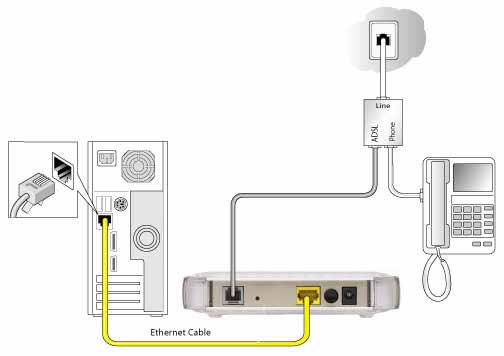
1. Plug the power in the back of the router along with the grey dsl cable and Yellow Ethernet Cable into the back of your PC as shown below.

2. Open up Internet Explorer or which ever browser you wish to use and enter the following in the address bar: http://192.168.0.1
3. It should ask you to enter a username and password as default enter admin as the username and as the password enterpassword.
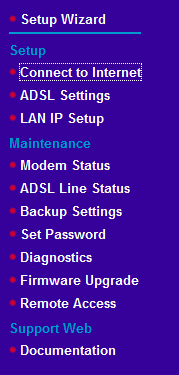
4. You should see the following menu on the left hand side click on ADSL Settings.

5. When you click on ADSL Settings you will see the screen in the middle showing the following.

6. In the following boxes make sure you have the settings inplace.
VPI: 0
VCI: 38
Protocol: PPPoA Bridging
Multiplexing Method:VC – Based
PPP username: t******@suffolkonline.net
PPP password: your SOL Password
Disconnect if no activity (in minutues): 0. This will mean it will never disconnect
MTU Size: 1500
DSL Mode: Auto
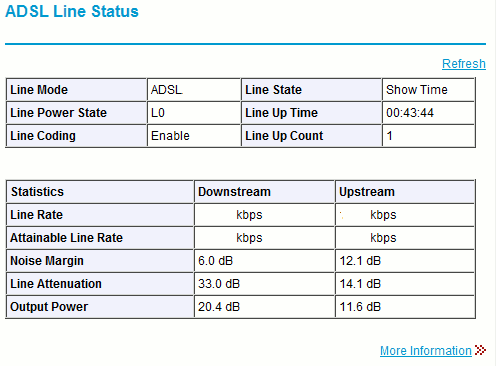
7. Once you have entered all the information into the boxes above click Apply and give your modem around 2 mintues and it should have connected to the internet. You can check to see if this has connect by click on the ADSL Line Status over to the left.

8. Your line state should be Show Time. If you have any problems with the equipment you can use the reset button at the back of the device or re-entering the information given. If you are still unsure then call the helpdesk for further information.